Art Projects
Zentangled Scratchboard
.JPG)
Sense
After watching multiple how to videos on Zentangled Scratchboard making, I attempted to create a scratch board that would show a variety of textures using multiple household tools. I have since discovered that using dish soap is the secret to creating a successful homemade scratch board. Next time I would also use oil pastels in a variety of colors to add interest to the picture.
Alien Names Project
.JPG)
Beautiful Creatures
This piece reflects a non-objective creature who lives in his own unique world. It was fun to take one's name and design a creature from it. This project would be great to teach kids about complimentary colors as they see their name come alive through the process of the lesson.
Cardboard Construction
.JPG)
Formal Sense
This sculpture was made with miscellaneous cardboard, acrylic paints, and a hot glue gun. I did not have an image in my mind of what the end result would look like, but was very excited when it began to take shape as I molded it into a non-objective cardboard creation.
Make Your Own Mask-Making Method Project
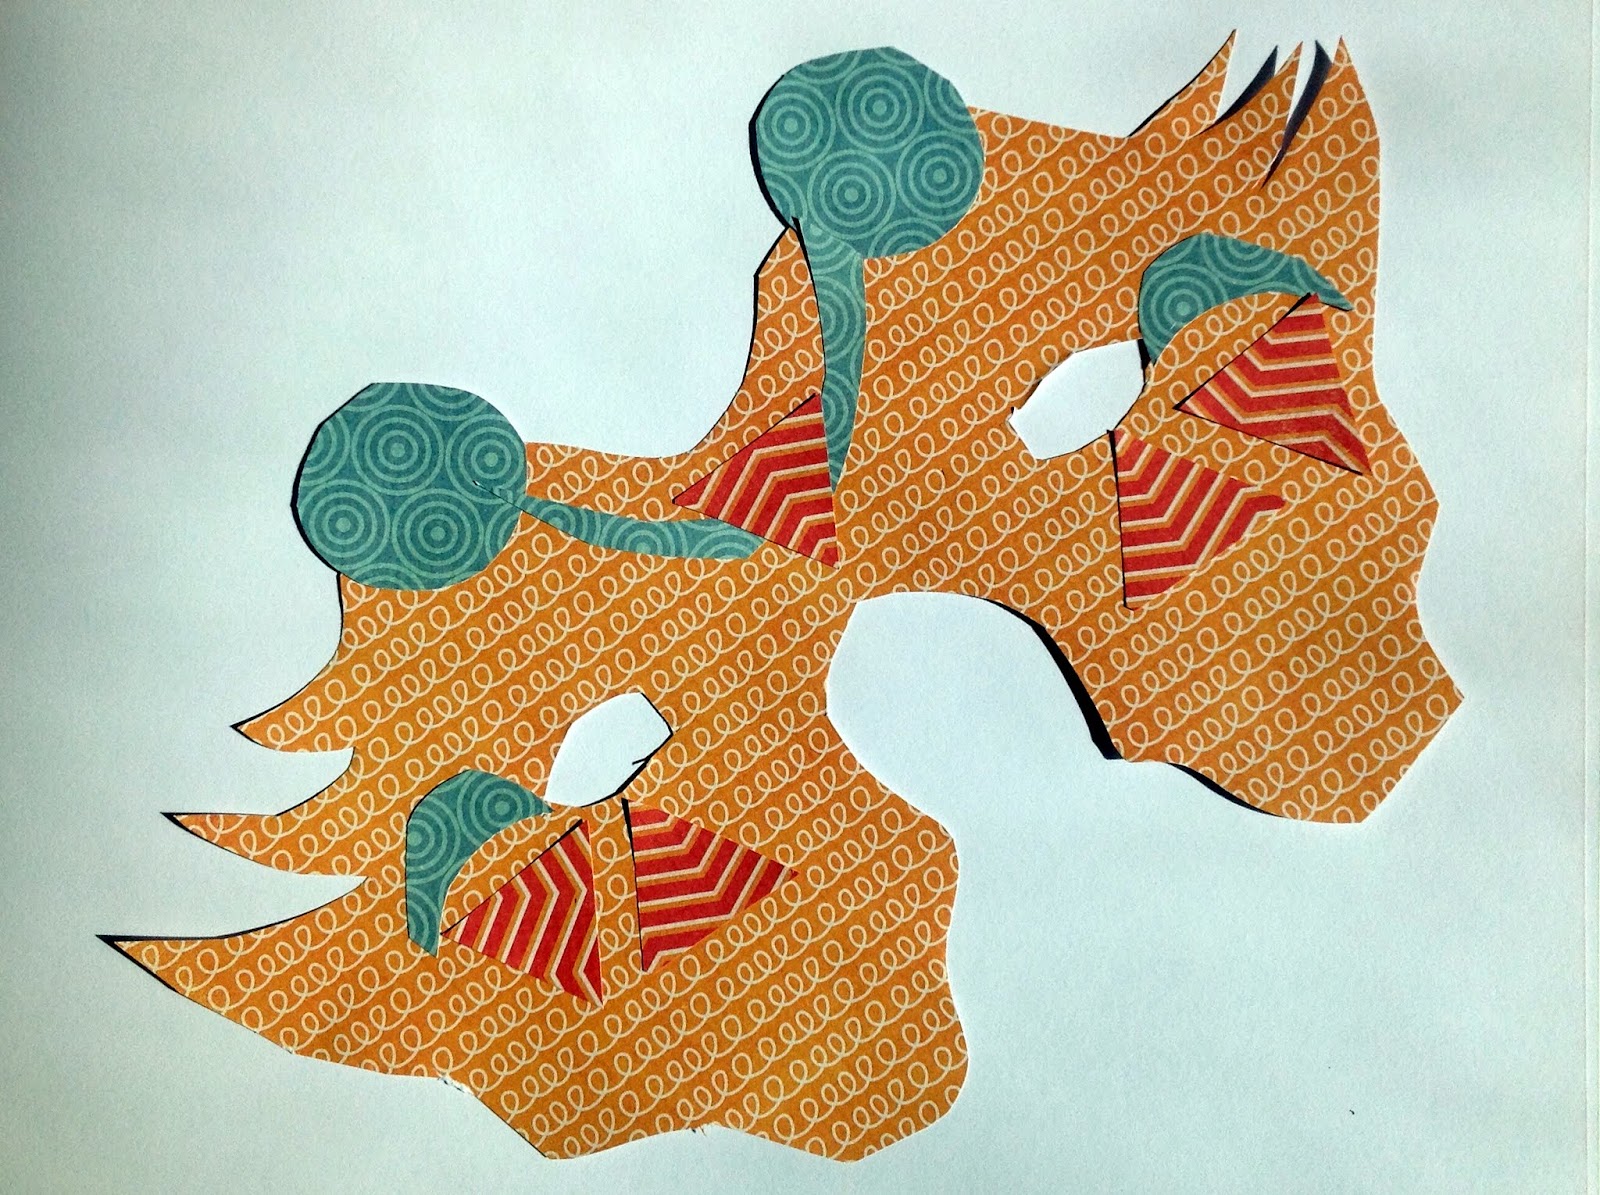
Illusions
After much research on different mask designs and cultures that still use masks today, I chose to do create this design to reflect something totally foreign and mysterious. It was easily assembled, and fun to create;therefore, this art project would be perfect for a younger group of art students who already have the cognitive capabilities in using scissors and glue.
Batik
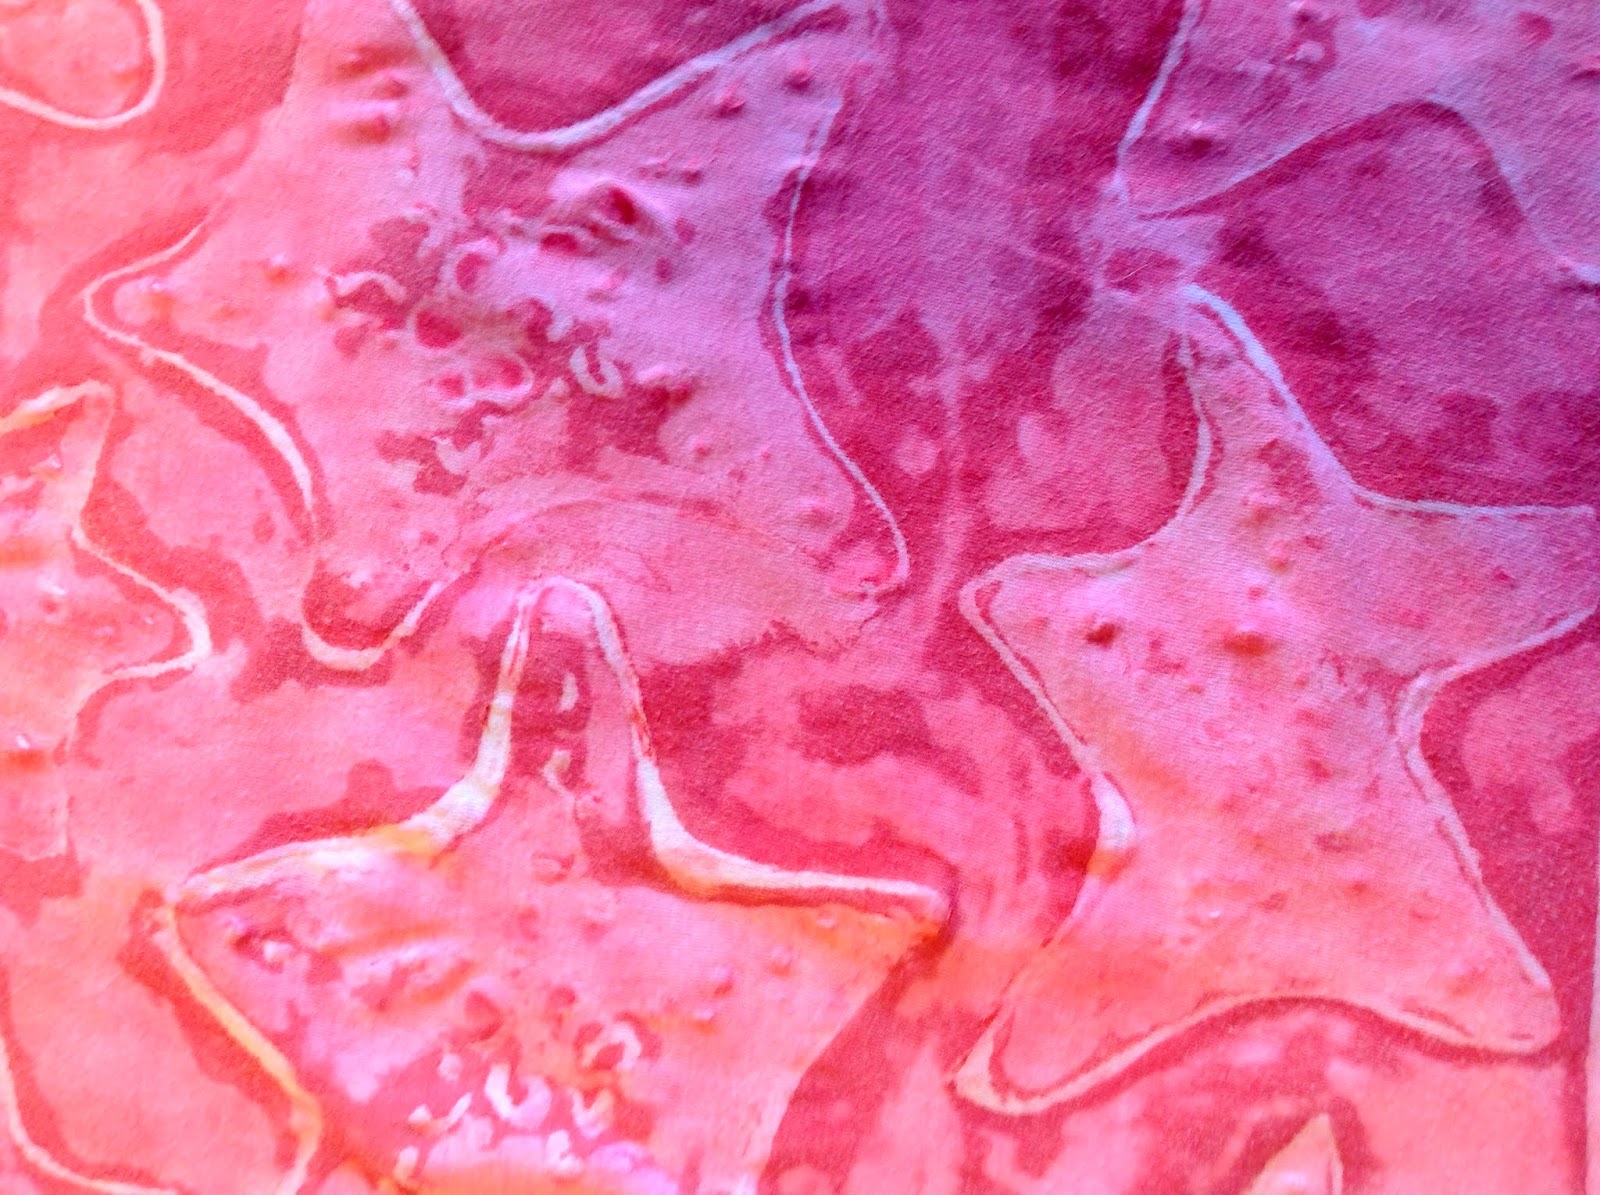
Fish Out of Water
My Batik incorporated the study or organic objects in the ocean. I love the intricate detail of starfish and their various sizes and kinds. After making several sketches of a variety of sea creatures, I created a pattern based on the characteristics. I drew out my pattern, transferred it onto a white t-shirt using Elmer's glue, then after the glue had dried painted my design with a deep red acrylic paint. When the paint was nearly dry, I washed out the majority of the paint wanting a splotchy look. I peeled away all the glue, then hung my shirt to dry. This illusion of water and starfish create a look of gazing through a red looking glass on a shallow edge of the shoreline.
Milk Jug Mask
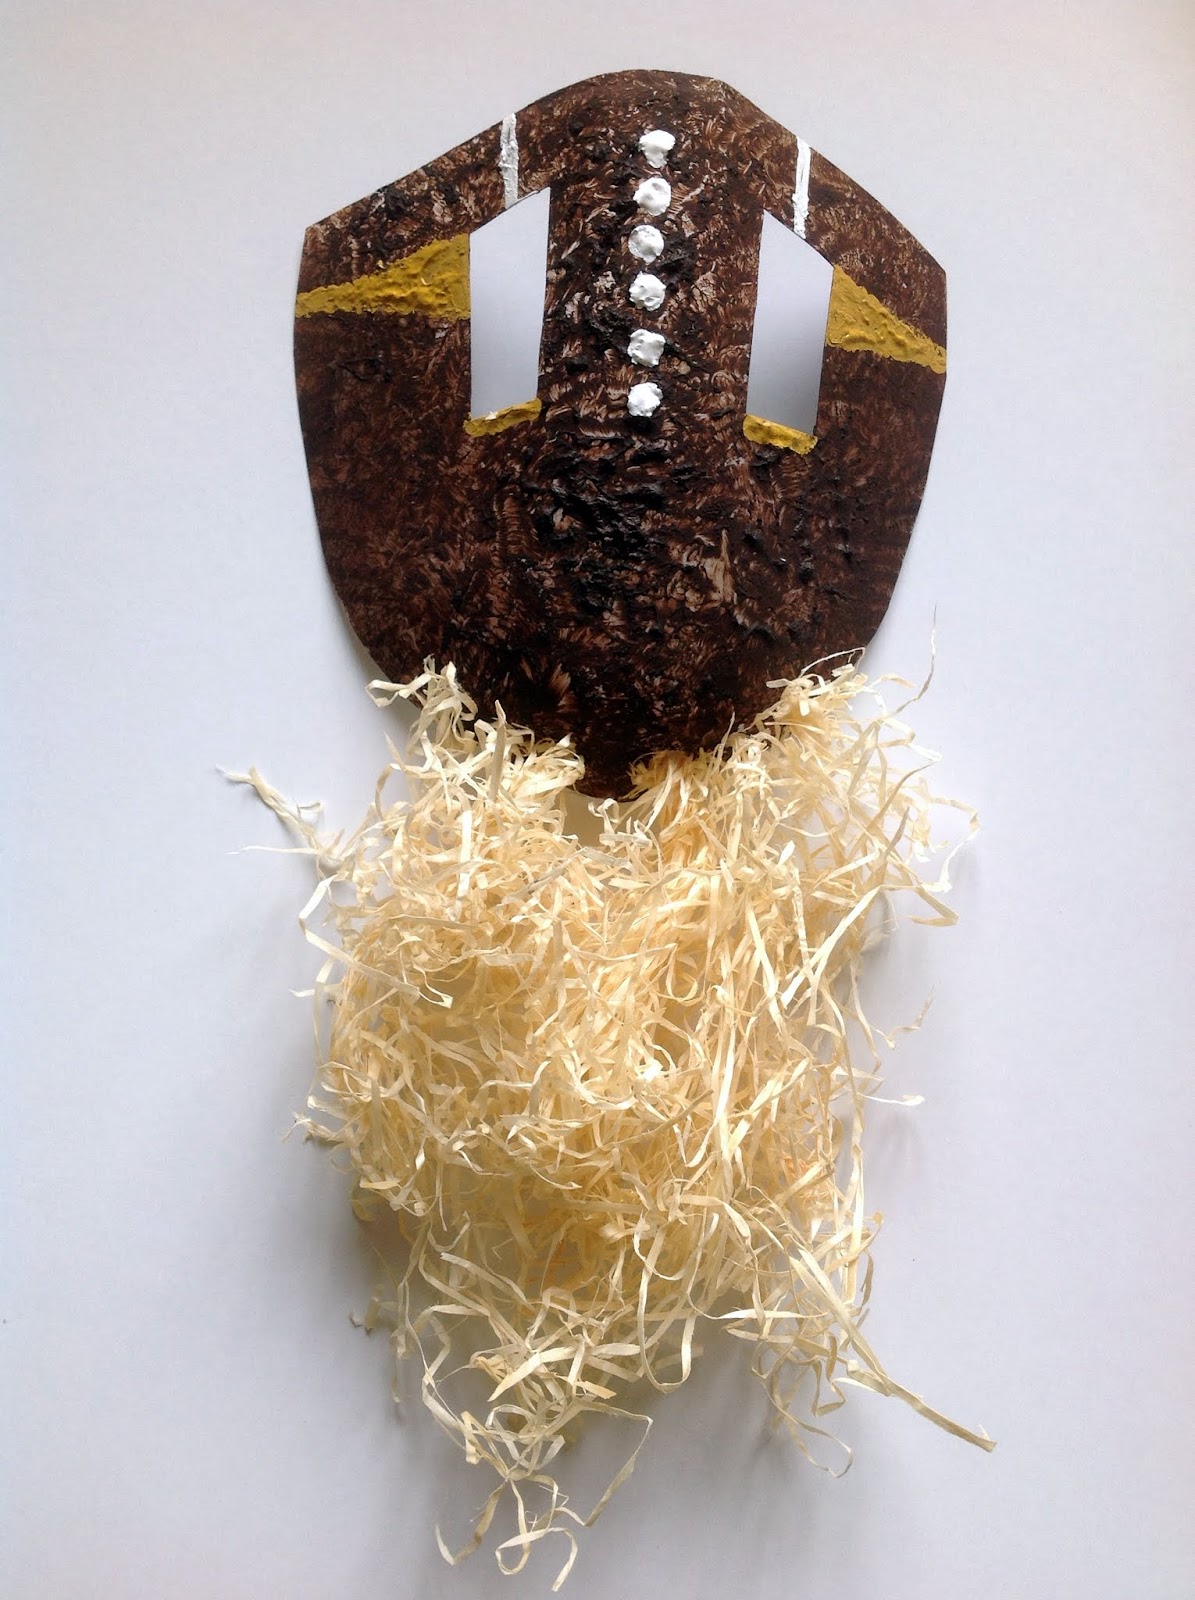
Masked
Light Painting
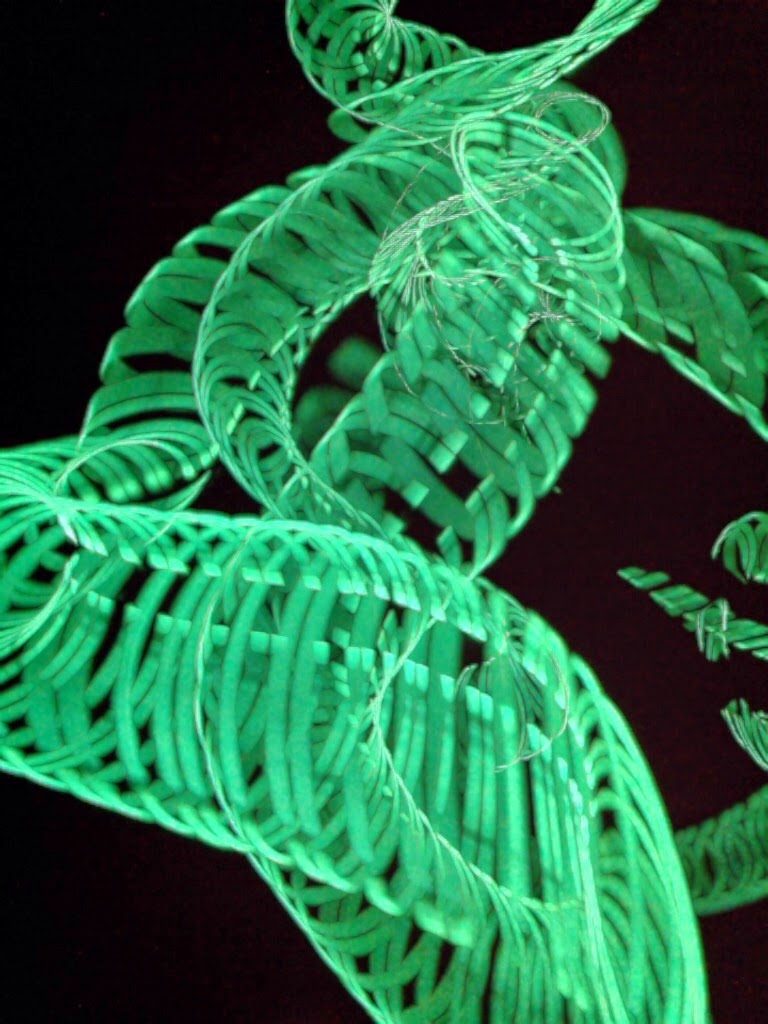
Moments
Using one light stick and a free app on my iPad, I was able to create an illusion of light moving through the air. This was my favorite of all the art projects I have completed this year and will definitely be doing this with my kids for fun this summer!
Notan
.JPG)
Peeping Wizards
An old Japanese Art, Notans are one of the simplest, yet optically appealing art creations. This piece uses a small square piece of black construction paper, a white full-sized piece of construction paper, scissors, and glue. I simply cut out various designs from the outside edge into the center, and then glued them down mirroring the spot of originality.
Foil Project
.JPG)
Natural or Not
I created this design by drawing onto cardboard the object I wished to portray. I then traced it with glue using a hot glue gun, and when it had finished drying covered it with tin foil. Smoothing down across the top of the tin foil, the image pops out at the viewer of the piece. I loved the final piece, but would keep this project for a more advanced class that could do the majority of the work themsleves. (The hot glue gun burns and fagile tin foil make this project a little tricky).
Mandela
-001.JPG)
Find One's Own
My Mandela uses symmetrical design, symbols, and color that portray how I perceive myself and values. The center flower depicts myself as natural, simple, and beautiful. The golden ring has four diamonds on each side reflecting my value in my marriage to my husband, also at the center of my world. The four flowers represent my children growing and blossoming into incredible individuals spreading their talents, love, and good works around them. The flames are my passion that represent what give each day excitement and fulfillment. The bubbles are my spontaneity. The rays of sun streaming over the clouds emit light, warmth, and truth. I created my Mandela by pencil sketch, tracing it with permanent ink, then finishing it with watercolor.
Georgia O'Keeffe
.JPG)
Crunching Apples
The outside of this piece was covered in masking tape to create a clean border, then using a small square to focus my mind and eye, I tried to watercolor the most interesting part of the apple that lay in front of me. It was very fun to experiment with finding how perception and focus effected how one perceived an object. This project would be a great to apply one's watercolor techniques while learning about Georgia O'Keeffe, a great icon in art history.
Water-colored Emotions Project
.JPG)
Fruity Flavors
This was one of my favorite projects! Using watercolor paint I portrayed onto paper the flavors of some of my favorite fruit. The fruits I chose were lemon, raspberry, strawberry, mango, and blueberry, I used table salt to create small details within the images, which lifted the paint back off the watercolor paper. (This was so fun! I could have used up my whole salt container!) It was a very abstract piece of art that tapped into my creativity and pushed me to a different level of thinking and looking at something from a different angle.
100-Color Challenge
.JPG)
Wonders of Colors
Using both acrylic and watercolor paint I created one hundred different colors. I roped my husband into experimenting with me to see what colors he could create as well which turned into a fun and collaborative project. I was pleasantly surprised at the easiness of using the watercolors with the sole purpose of creating our own colors and fustrated with the difficulty of the acrylic color variety we could create. This is a great project for introducing different mediums before diving into a more formal piece.
Printmaking Project
.JPG)
Apples to Apples
This project was a struggle for me! I used red and yellow acrylic paint for this piece which was hard to control the amount that came off onto the paper. I also chose to use the bottom of a paper towel roll because I felt it would give it a fun intricate design, but found left the piece too simple and without much detail. It would be fun to redo this project having carved out my own stamps using a variety of sponges or other objects that leave more detail.
Practicum Presentation on Prezi
http://prezi.com/r-ccqtk4lvze/?utm_campaign=share&utm_medium=copy
Lesson Plans
April Finlinson
1st
Grade Lesson Plan
Objective:
By completing the activities, the student will understand the textures smooth,
rough, and soft, and will be able to represent those textures through the
creation and display of a work of art.
Visual
Arts Standards Addressed:
Creating: VA:Cr1.2.1a Use
observation and investigation in preparation for making a work of art.
Creating: VA:Cr2.1.1a
Explore uses of materials and tools to create works of art or design.
Materials:
Crayons,
16”x11” Construction paper, Cotton balls, Sandpaper, Cobblestone
Vocabulary:
Texture:
the way a surface feels.
Pedagogy:
I will have a collection of
different objects for each of the students to explore how they feel to the
touch.
I will have pair them each with a
partner whom they will work with throughout the discussion. Each pair will be
given a collection of objects to explore how they each feel to the touch.
I will teach the vocabulary word of
texture, have each of the students look at the objects one by one, and help me
to find the smooth, bumpy, and soft textured items.
I will help define smooth, bumpy,
and soft by creating a definition with them using the words they use to
describe the items. I will do this by following their responses by asking,
“what makes you say that?” and “what more can you see or feel?”
When I have established that they
have a strong foundation for what these textures are, and how they each feel, I
will give instructions for their art project.
I
will have them fold their long construction paper into four sections by
following my every move. I will then tell them that in the first box they can
create the most delicious candy the world has ever tasted by drawing a picture
of it with their crayons and showing different textures to create a type of
food that they like. The second box will show the kind of wrapper it will come
in. The third box will show how it would taste in your mouth. The fourth would
show how it would taste if it was rotten.
Assessment:
After they have finished, they will
write their names on the back, and then use a magnet to attach it to the front
white board for display. We will walk around and talk about the different
textures we see in one another’s pictures and how they showed texture by using
crayons and paper.
“What do you see that is similar?”
“What do you see that is different?”
“What’s another way we could show
that texture?”
“What do you see?”
“How do the colors they chose make
you feel?”
“What more can you see?”
We will finish by having them each go
back to their seat and have them look at their own artwork and think about what
their favorite thing about their artwork is. If there is time we will have a
couple of them share with the class their thoughts.
Lesson Plan #2
April Finlinson
4th
Grade Lesson Plan
Objective:
By completing the activities, the students will understand the art method of
pointillism. The students will be able to represent pointillism through the
creation and display of a work of art.
Visual
Arts Standards Addressed:
·
Investigate: VA:Cr2.1.4a Explore and
invent art-making techniques and approaches.
·
Perceive: VA:Re.7.1.4a Compare responses
to a work of art before and after working in similar media.
·
Investigate: VA:Cr2.2.4a When making
works of art, utilize and care for materials, tools, and equipment in a manner
that prevents danger to oneself and others.
Materials:
Washable
Acrylic Paints in Red, Yellow, and Blue, No 2 pencil, 4”x 4” Drawing Paper,
Crayola Large Washable 8 pack Markers
Vocabulary:
Pointillism:
a style of painting in which a picture is formed from small dots of color.
Pedagogy:
I will have a collection of different
pictures of works of art where pointillism was used to create the artwork.
I will have them walk around the
room and look at the different art works set up around the classroom.
After everyone has had the chance to
see each of the artworks, I will have them return to their seats for our
discussion. We will discuss the artworks they saw, and I will ask them the
following questions:
“What do you see that is similar in all
of these paintings?”
“What makes you say that?”
“What more can you see?”
“Does the method, or way the Artist
painted look similar in each of these paintings?”
“How do the colors mix to create
other colors?”
I
will then teach the vocabulary word of Pointillism, display blown up copies of
the pictures they just looked at on the overhead, and teach about how
Pointillism is used in these works of art.
When I have established that they
have a strong foundation for what Pointillism is and how it is used, I will
give instructions for their art project.
First:
I will have them write their names at the bottom right corner of their pieces
of drawing paper with their number two pencils.
Second:
I will have them draw three different shapes, each the size of their hand,
which slightly overlap one another.
Third:
I will have them use two colors per shape that they drew. They will use the
back of their markers to dip into the different colored paints one at a time,
to create dots of various colors. The dots will be slightly touching one
another as they fill the entire shape with dots.
Fourth:
After they have filled each of their three shapes with two colors of dots, I
will have them place their art piece on the side counter to dry while they
clean up their area.
Assessment:
As they are working on their art
projects, I will walk around the room and ask questions about the individual
art works to understand the method they are using to create the color they want
portrayed for their artwork.
“What colors did you choose?”
“What made you choose those specific
colors?”
“What do you like the best about
this method?”
“Besides Pointillism, what’s another
method we could create that color?”
“What colors do you see when you
look at the picture closely?”
“What colors do you see when you
look at the picture from afar?”
We will finish by having them think
about what their favorite thing about this method of painting was. If there is
time we will have a couple of them share with the class their thoughts.
Lesson Plan #3
April Finlinson
5th
Grade Lesson Plan
Objective:
By completing the activities, the student will (C)understand and (P)demonstrate
the elements of line using straight and curved lines by (P)creating a two
dimensional image that looks three dimensional.
Visual
Arts Standards Addressed:
·
Investigate: VA:Cr2.2.5a. Demonstrate
quality craftsmanship through care for and use of materials, tools, and
equipment.
·
Investigate: VA:Cr2.1.5a. Experiment and
develop skills in multiple art-making techniques and approaches through
practice.
English
Language Arts Standard Addressed:
·
CCSS.ELA-LITERACY.RL.5.1. Quote
accurately from a text when explaining what the text says explicitly and when
drawing inferences from the text.
Materials:
King Midas and the Golden Touch Story, Drawing
Paper, Pencil, Markers, Crayons (or Colored Pencils), and Playdough,
Vocabulary:
Line:
An element of art defined by a point moving in space.
Contour
lines: An outline.
Form:
A three-dimensional image.
Line
quality: the thickness or thinness of a line.
Pedagogy:
I will tell them about one of my favorite
elements of Art is Line, and how understanding lines will help them create
better art.
I
will then teach the vocabulary word of Line. I will lead a discussion to help them
identify different kinds of lines (continuous line, curved lines, zigzag, that
we can see around the room using the following prompts:
“Do
you see any lines throughout the classroom?”
“What kind of line is it?”
“What makes you say that?”
“What other lines do you see?”
I will tell them that today we will
use lines to create an illusion or to trick our eyes into thinking we are
seeing something come out of a paper or other flat surface, like it is
three-dimensional, even when it really isn’t.
I will then have the paper passers
pass out papers while I introduce the story of King Midas and the Golden Touch. This is a myth, or a tale that is
handed down by word of mouth for generations about a king who felt that there
was nothing more precious than gold, so when granted a wish, he asked for
everything that he touched be turned to gold.
I will instruct them that while they
work on their magical touch illusion piece, to be thinking about what they
would wish for.
I will then tell them to pull out the
piece of paper that was given to them, a pencil, and a set of coloring utensils
(markers, and crayons or colored pencils), and write their names in the top
left corner.
I will have them put their pencils
down and put their hand on their head to show they are done after completing
the task. After I finish giving the instructions, then tell them to start on
their piece of art.
I will demonstrate how to trace
their hand (including the part of the arm resting on the paper) with a pencil.
Then using a marker draw a continuous line from left to right using a straight
line on the outside of the handprint image, and a curved line on the inside of
the image.
I will then have them repeat this
method until the whole paper is covered in the contour lines.
I
will then tell them that they will then take out only three colors of their
choice, and using a repeated pattern, color the spaces between the lines until
the entire piece is filled.
I
will tell them to start on their pieces, using the examples on the board in front
of them for a reference while I read the story King Midas and the Golden Touch.
(If
there is additional time: After reading, I will then give them their play dough
and have them create a non-objective shape that represents the thing that they
would wish for. They will then place the completed shape on their artwork near
the fingertip of the pointer finger like it is being touched).
Assessment:
After they have finished, they will place
it in the side counter under the windows for display and clean up their work
area putting all supplies used back where they are kept in the classroom.
I
will ask them to tell me what a line is, what the king valued the most in the
story, and what evidence in the story helped them know this.